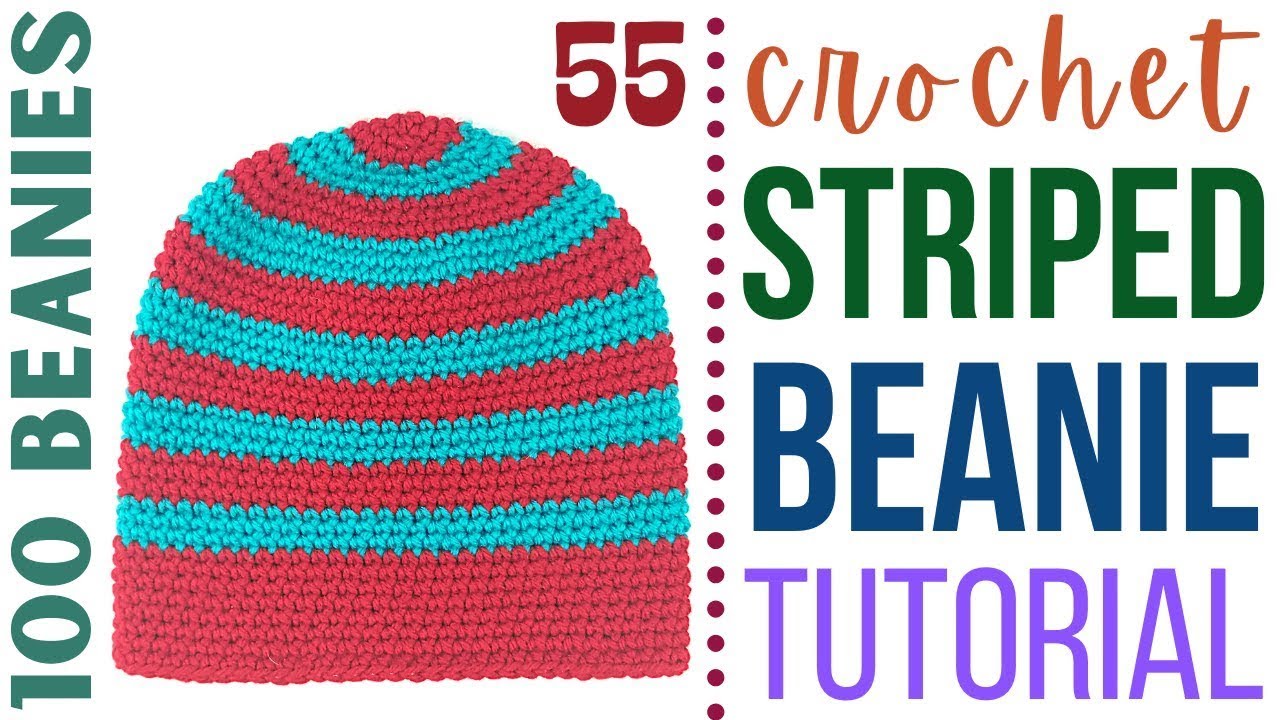
How to Crochet a Beanie with Visor Brim
NEW CROCHET BEANIE with a VISOR pattern and tutorial! This crochet beanie is so simple that you can complete it in a few hours. This beanie has a small visor to help protect your skin on sunny, cold days, while the beanie keeps your ears and head warm. This is a great spring beanie for this reason! This beanie tutorial also includes a few stitch tutorials to help familiarize you with stitches that you might normally be too intimidated to try. This beanie consists of: Magic Circle, DC, SC, FRONT and BACK POST stitches, TR, HDC, and SL st. I show you how to work ALL of these stitches so you can practice with ease as you go.

Crochet Beanie with Visor Brim
Crochet Hook: G/6/4.25MM
Yarn: Size 4, Medium Weight, Cascade Yarns Wool Yarn, Burgundy
Attach yarn to crochet hook using a Magic Circle (MC).
Row 1: CH 1, then place 1 SC + 15 DC inside the MC. Place 1 DC in the 1st SC to join.
Row 2: Following a spiral pattern (make sure you mark the 1st st of each of the remaining rows with a stitch marker, safety pin, or scrap piece of yarn), place 1 SC in each st in the row (16 total st).
Row 3: Place 2 DC in each st in the row (32 total st).
Row 4: Place 1 SC in each st in the row (32 total st).
Row 5: Place **1 DC in st 1, then 2 DC in st 2.** Repeat this around the row (48 total st).
Row 6: Place 1 SC in each st in the row (48 total st).
Row 7: Place **1 DC in st 1 – 2, then 2 DC in st 3.** Repeat this around the row (64 total st).
Row 8: Place 1 SC in each st in the row (64 total st).
Row 9: Place **1 DC in st 1 – 3, then 2 DC in st 4.** Repeat this around the row (80 total st).
Row 10: Place 1 SC in each st in the row (80 total st).
Row 11: Place 1 DC in each st in the row (80 total st)
Rows 12 – 25: Repeat Rows 10 & 11.
Row 26: Alternate between FRONT and BACK POST stitches.
Rows 27 – 28: Following LIKE stitches, alternate between FRONT and BACK POST stitches.
Row 29 – Place 1 SC in the next 22 st, then place 1 SC in the FLO of the next st, 1 HDC in the FLO of the following st, then 1 DC in the FLO of the st after that. From here, count out 31 stitches and mark the 31st st. From here repeat this pattern: **1 TR in the FLO of st 1 – 2, 2 TR in the FLO ofst 3.** until you make it to your st marker, then place 1 DC in the FLO of the next st, 1 HDC in the FLO of the following st, and 1 SC in the FLO of the st after that. Then working under the FULL next st, place 1 SL st. Turn work DO NOT CH to turn.
Row 2 of Bill: Place 1 SL st back in the SL st you just placed at the end of the last row, then 1 SC in the following st, 1 HDC in the st after that, and 1 DC in the next st. From here repeat this pattern: **1 TR in st 1 – 3, 2 TR in st 4** until you make it to the last 3 st of the previous row (where you starting working in the FLO). Place 1 DC in the next st (this should be in the previous row’s DC st), then 1 HDC in the following st, and 1 SC in the st after that. Place 1 SL st in the next st (this should be on the base of your brim). Turn your work. DO NOT PLACE CH st to turn.
Row 3 of Bill: Working in the left over BLO from Row 1 of the bill of the beanie, place 1 SC, then 1 HDC in the next st, then 1 DC in the following st. From here, repeat this pattern: **1 TR in st 1 – 2, 2 TR in st 3.** until you make it to the last three BLO. Place 1 DC in the next BLO, then 1 HDC in the following BLO, and 1 SC in the last BLO. Place 1 SL st in the next st, then turn work.
Row 4 of Bill: Place 1 SL st back in the previous row’s SL st, then 1 SC in the next st, 1 HDC in the following st, and 1 DC in the st after that. From here, repeat the following pattern: **1 TR in st 1 – 3, 2 TR in st 4** until you make it to the last 3 st of the bill of the beanie. Place 1 DC in the next st, 1 HDC in the following st, then 1 SC in the next st. Place 1 SL st in the next st and turn work.
Row 5 of Bill: Line up the two layers of the bill and working in the next st on each layer, place 1 joining SL st, then place joining SL st up the corresponding stitches that make up the bill until you make it to the other side of the beanie. From here, place 1 SC in the next 22 to make it back around to the end of the row.
Place 1 SL st in the next st, then cut and tie off yarn.
Other Crochet Beanies

Leave a Reply