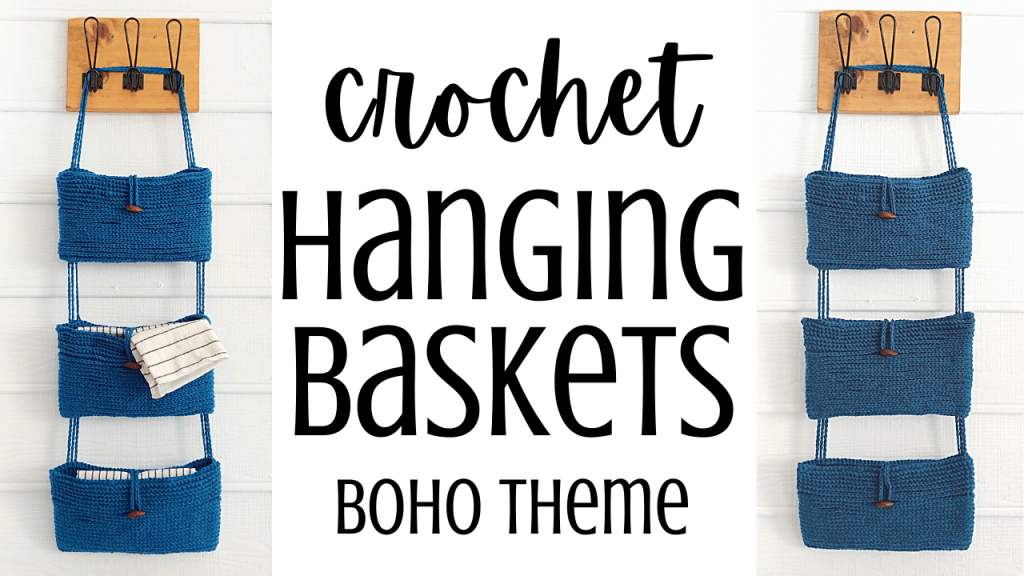
Crochet Hanging Basket Trio Tutorial
How to crochet hanging baskets? In this crochet tutorial, I show you how to crochet a hanging basket trio that is great for bathroom storage, over a door, or a baby room. These hanging baskets are sturdy and soft, making them ideal for almost anything.
Crochet Hanging Baskets Video Tutorial:

These boho crocheted hanging baskets are very simple to make and only require you to know how to make a chain, single crochet, and slip stitch. These baskets would be adorable in different colors, and the pattern can be expanded or shortened to fit your basket storage needs!
Link to toggle buttons: https://www.joann.com/la-mode-2-pk-1.25-toggle-buttons-brown/1845858.html
DIY Crochet button tutorial HERE:

Crochet Three-Tier Hanging Basket Pattern:
Crochet Hook: H/8/5MM
Yarn: 4 Medium, ~650 yds
Attach yarn to crochet hook using a slip knot.
Row 1: CH 46, turn.
Row 2: Skipping the 1st CH st of the row, place 1 SC in the BLO of each st in the row (45 total). Turn work so you can work in the front loops, then place 1 SC in each of the front loops, creating an oval of 90 SC st.
Rows 3 – 21 : Following a continuous loop pattern, place 1 SC in the BLO of each st in each row, starting with the 1st SC created in Row 2. End the last row on one of the folds on the basket.
Row 22: Crochet chain stitches until the chain row is as long as the top of the basket + 15 chains, then SL st in the last st you worked before placing the CH stitches.
Row 23: Working over the chain loop you created in Row 22, place 1 SC in the BLO of the 1st 22 stitches. Then pull a little slack out of the chain loop (to created the loop over the toggle button) toward the front of the basket (the front of the otherside). From here, keep placing the SC in the BLO of each st in the row, working over the Chain loop still until you get to the end of the row.
Rows 24 – ?: Turn you work so you can work in the FLO of the last stitch you just created in Row 23, place 1 SL st in the FLO. Then place 1 SC in the FLO of each st in each row until you get to the last FLO at the bottom of the basket.
Cut and tie off yarn.
Attach button on the front of the basket so that the loop will fit snuggly around it. I secured the button to the base row between two outer rows of SC stitches.
Repeat above steps for two additional baskets.
To assemble the baskets, place them face down with the top pointing up.
- Attach yarn to crochet hook and insert crochet hook in one of the outer SC stitches on the second row from the bottom, roughly 1 inch from the fold. Place 1 SC in this stitch, then working up the basket, create a vertical line by placing 1 SC in one of the SC stitches in the row above the current st. Repeat this process until you get to the second to last row from the top, then CH 12. In next basket, insert crochet hook in the second to last row, 1 inch from the fold (same place as the first basket), and place 1 SC there. Then place SC stitches up the second basket the same way you did the first. CH 12 and repeat for the third basket.
- At the top of the third basket, CH 60, then work a vertical line of SC stitches down the other side of the top of the top basket. When you get to the second to last row, CH 12, and work the second and third baskets in the same spot as the first basket.
- At the end of the last basket, place 1 SC in the SC st BESIDE current st, then work the pattern back up the exact same way you did the first time, only 1 stitch in from the last vertical line. Follow the pattern until you get back down to the other side of the bottom of the bottom basket.
- Repeat the process of working in the stitches BESIDE the last set.
- When you get back down to the bottom of the bottom basket, cut and tie off your yarn. The baskets should be joined by three sets of stitches and chains, making them extra secure.
- Consider placing scrap cardboard strips in each of the baskets to help them hold their shape while hanging.
Other Crochet Basket Tutorials:


Leave a Reply