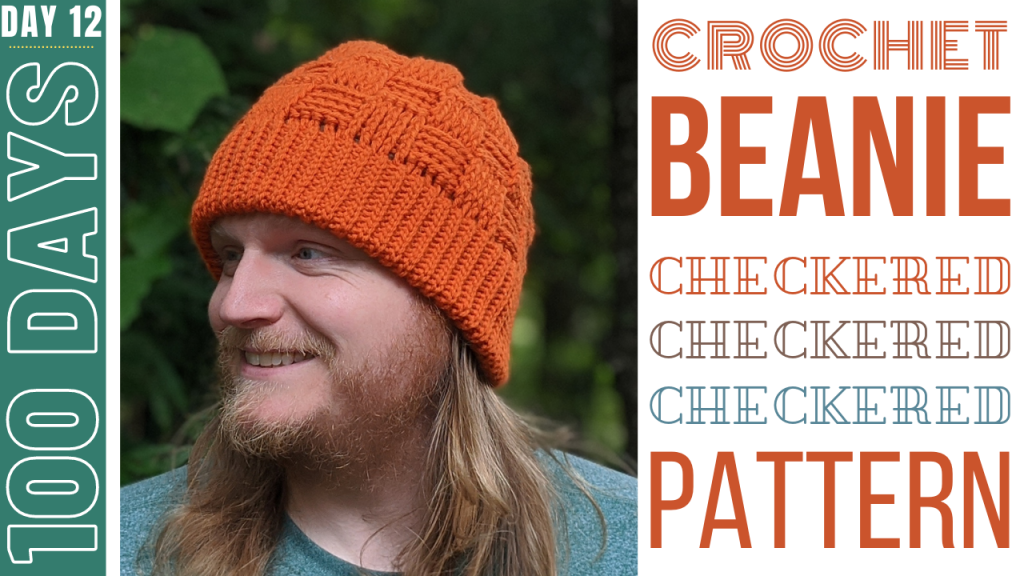
DIY Crochet Beanie – Day 12 – Checkered Beanie
How to crochet a beanie? In this tutorial, I show you how to crochet a checkered beanie using front and back post stitches. This pattern is extremely easy to follow and adaptable to your sizing needs. This beanie works quickly and shouldn’t take you more than 2 hours to complete. The colors used in this pattern can easily be exchanged to fit whatever color scheme you like.
How to Crochet a Beanie Brim: https://youtu.be/V2zw-4mWR8E
Attach a pom pom: https://youtu.be/6ISz8AcMusk
Crochet Checkered Beanie Video Tutorial:

Stitches used in this pattern (and their corresponding tutorials):
Attach Yarn to Crochet Hook: https://youtu.be/IsOvsrvJhN8
Chain (CH): https://youtu.be/jLP-o-RnqqQ
Slip stitch (SL st): https://youtu.be/cMNam0kuhpQ
Double Crochet (DC): https://youtu.be/bA7b2sOIfzM
Single Crochet (SC): https://youtu.be/xppth_5GBzM
Checkered Beanie Crochet Pattern:
Crochet Hook: F / 5 / 3.75MM
Yarn: 4 Medium ~ Big Twist Value brand
*Note: this pattern has a precursor video: How to Crochet a Beanie Brim: https://youtu.be/V2zw-4mWR8E
Row 1: Create a brim that is 25 st deep. Connect brim edges as shown in video, then fold in half lengthwise, hiding the ridge “eyesore” in the inside fold. SL into corresponding st on opposite edges, CH 2, and place 80 DC around the edges of the brim, crocheting the two sides together as you do so. It might be helpful to use a scrap piece of yarn or stitch marker to section off the brim into four even parts and place 20 DC inside each section. *CH 2 counts as 1st DC.
Row 2: Following a continuous loop pattern, place 1 FRONT POST st in the next 5 st. Then place 1 BACK POST st in the next 5 st. Continue alternating between FRONT and BACK POST stitches every five stitches.
Rows 3 – 5: Follow the same pattern as the previous row, placing FRONT POST stitches where the previous row had FRONT POST stitches and BACK POST stitches where the previous row had BACK POST stitches.
Row 6: Reverse the order of your POST stitches, placing FRONT POST stitches in your previous row’s BACK POST stitches and visa versa.
Rows 7 – 9: Follow the same pattern as the previous row, placing FRONT POST stitches where the previous row had FRONT POST stitches and BACK POST stitches where the previous row had BACK POST stitches.
Row 10: Reverse the order of your POST stitches, placing FRONT POST stitches in your previous row’s BACK POST stitches and visa versa.
Rows 11 – 13: Follow the same pattern as the previous row, placing FRONT POST stitches where the previous row had FRONT POST stitches and BACK POST stitches where the previous row had BACK POST stitches.
Row 14: *1 SC in first 6 st, SC 2together in st 7 & 8.* Repeat * around the row (70 st at the end of the row).
Row 15: *1 SC in first 5 st, SC 2together in st 6 & 7.* Repeat * around the row (60 st at the end of the row).
Row 16: *1 SC in first 4 st, SC 2together in st 5 & 6.* Repeat * around the row (50 st at the end of the row).
Row 17: *1 SC in first 3 st, SC 2together in st 4 & 5.* Repeat * around the row (40 st at the end of the row).
Row 16: *1 SC in first 2 st, SC 2together in st 3 & 4.* Repeat * around the row (30 st at the end of the row).
Row 17: *1 SC in st 1, SC 2together in st 2 & 3.* Repeat * around the row (20 st at the end of the row).
Row 17: *SC 2together around the row (10 st at the end of the row).
Row 87: *SC 2together around the row (5 st at the end of the row).
SL into loop on opposite edge of small remaining hole.
Cut and tie off yarn.
Attach a pom pom: https://youtu.be/6ISz8AcMusk
Other beanie tutorials in my 100 day series:

![]()
![]()
![]()
![]()
![]()
![]()
![]()
![]()
![]()
![]()
![]()
![]()
![]()
![]()
![]()
![]()
![]()

Leave a Reply