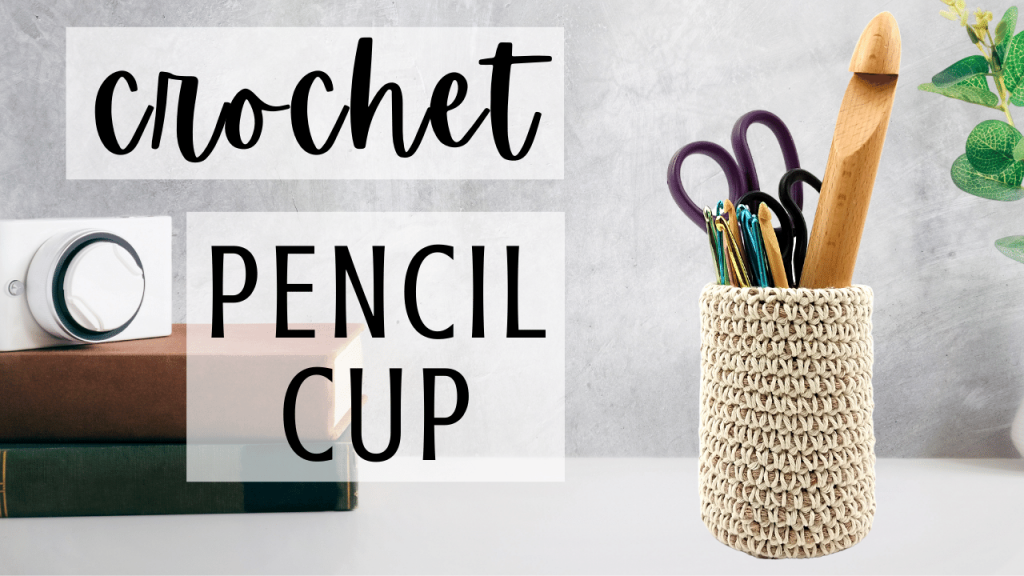
Crochet Pencil Cup
How to crochet a pencil cup? In this quick and easy crochet tutorial, I show you how to create a pencil cup using a steel can and yarn! This DIY is a great addition to your home (or real) office, as a gift, small basket, or other storage option!

Stitch Tutorials for this Project:
Attach Yarn to Crochet Hook Using a Slip Knot: https://youtu.be/IsOvsrvJhN8
Chain (CH): https://youtu.be/jLP-o-RnqqQ
Magic Circle or Magic Loop (MC): https://youtu.be/pTcHUJ8PDMQ
Slip Stitch (SL st): https://youtu.be/cMNam0kuhpQ
Single Crochet (SC): https://youtu.be/xppth_5GBzM
Crochet Pencil Cup Pattern:
Materials:
Crochet Hook: G/6/4.25MM
Yarn: Lion Brand Yarn Re-Up 100% Recycled Cotton & Polyester Blend
Size: 4 Medium
Colors: Full Moon & Mineral Springs
Other: 16 Ounce Steel Can & Stitch Marker or Scrap Strand of Yarn
Attach Color B to the crochet hook using a slip knot and start to create a very long chain rope. You will need a lot of this, so feel free to chain as much as you want. Pull yarn out of loop, making the loop large so you can reinsert the crochet hook as needed.
Row 1: Attach Color A to the crochet hook using a magic circle. Slide crochet hook into 1st CH st created with Color B and yarn over and drop all the loops on the crochet hook. You should have Color A on the crochet hook now. From here, for the entire pattern, we are going to crochet over the CH rope created with Color B. CH 1, then place 6 SC inside the MC.
Row 2: Following a continuous loop pattern (which means we won’t be starting or stopping our individual rows, instead this pattern acts like a spiral). Starting with the 1st SC from Row 1, place 2 SC in each st in the row (12 total SC st). Use a st marker to mark the first st of each row (otherwise you won’t be able to tell where each row ends).
Row 3: Place *1 SC in st 1, and 2 SC in st 2.* Repeat * around the row (18 total SC st).
Row 4: Place *1 SC in st 1 – 2, and 2 SC in st 3.* Repeat * around the row (24 total SC st).
Row 5: Place *1 SC in st 1 – 3, and 2 SC in st 4.* Repeat * around the row (30 total SC st).
Row 6: Place *1 SC in st 1 – 4, and 2 SC in st 5.* Repeat * around the row (36 total SC st).
Rows 7 – 33: Place 1 S in each st in the row (making sure you are still working over the CH rope. Add additional chains to the CH rope as necessary to complete the pattern).
Insert can into sleeve.
Row 34: Place *1 SC in st 1 – 4, and SC 2together in st 5 & 6.* Repeat * around the row (30 total SC st).
Row 35: Place *1 SC in st 1 – 3, and SC 2together in st 4 & 5.* Repeat * around the row (24 total SC st).
Row 36: Place *1 SC in st 1 – 2, and SC 2together in st 3 & 4.* Repeat * around the row (18 total SC st).
Row 37: Place *1 SC in st 1, and SC 2together in st 2 & 3.* Repeat * around the row (12 total SC st).
Row 38: SC 2together around the row (6 total SC st).
Pull chain stitches out of Color B until you only have 1 loop sticking out, then insert crochet hook in the loop and draw the new loop through the old loop. Cut and tie off yarn, leaving a long tail. Weave the tail in and out of the 6 SC and pull tight to cinch. Tie off yarn a few times to secure. Hide tails on inside of the sleeve (between the sleeve and the can).
Crochet Basket Tutorials:

Leave a Reply