
How to Crochet a Beanie – Day 4
How to crochet a beanie? In this tutorial, I show you how to crochet a beanie using a criss-cross pattern that is extremely easy to follow. This beanie works quickly and shouldn’t take you more than 2 hours to complete. The colors used in this pattern can easily be exchanged to fit whatever color scheme you like.
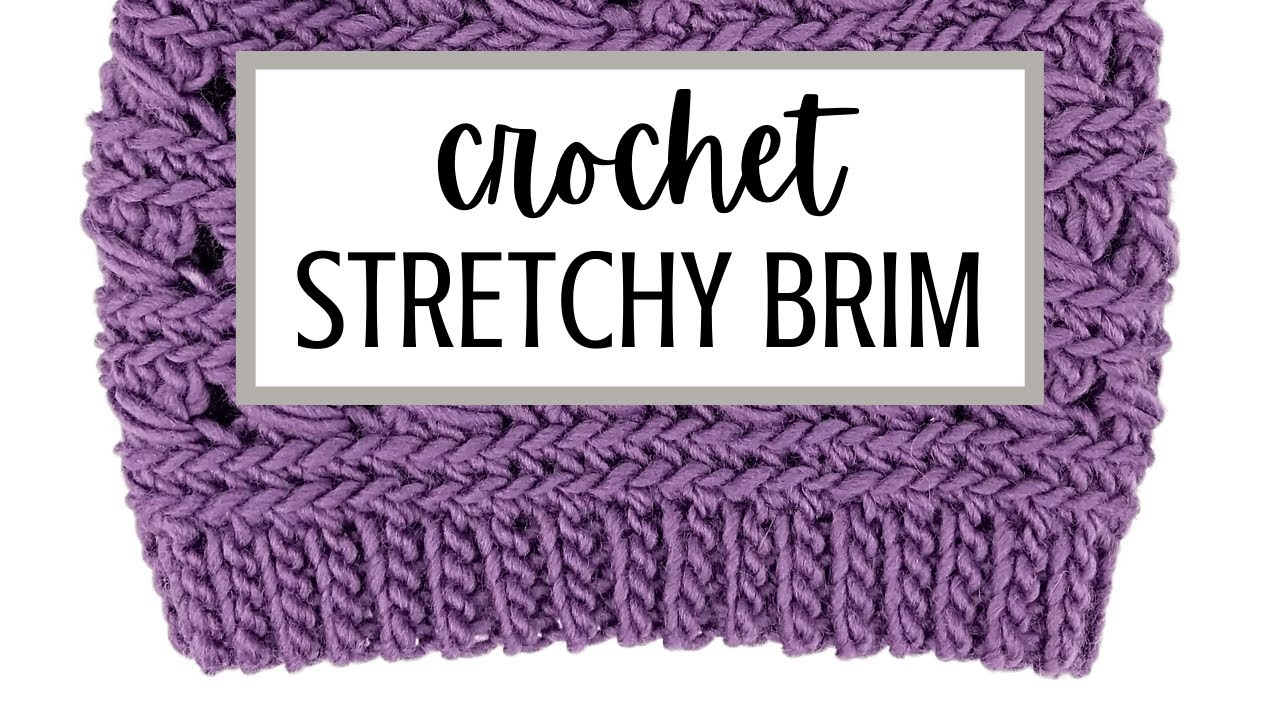
How to crochet a brim:
Crochet Criss Cross Beanie Video Tutorial:

This beanie is part of a series of beanies that I am creating to donate to my local homeless shelter. The goal is to complete 100 beanies in 100 days, all using unique patterns that I am going to share with you each day.
Stitches used in this pattern (and their corresponding tutorials):
Criss-cross stitch beanie pattern:
Crochet Hook: F / 5 / 3.75MM
Yarn: 4 Medium ~ Big Twist Value brand, 2 different colors
*Note: this pattern has a precursor video: How to Crochet a Beanie Brim: https://youtu.be/V2zw-4mWR8E
**1st st criss cross pattern: CH 3, then place 1 DC in st (or loops if working around brim) behind CH 3 (working backwards).
***Regular criss-cross st pattern: Skip next st (this is working forwards, and is a stitch that you haven’t already worked in), place 1 DC in st following skipped st. Place 1 DC in skipped st (working backwards).
Row 1: Create a brim that is 25 st deep. Connect brim edges as shown in video, then fold in half lengthwise, hiding the ridge “eyesore” in the inside fold. SL into corresponding st on opposite edge, and place 40 criss cross stitches along the two edges (See ** and *** for how to place these stitches), connecting them together while you crochet. It can be helpful to use stitch markers or scrap pieces of yarn to divide the brim evenly so that your stitches are placed evenly around the brim (I like to divide mine into four sections, placing 10 criss-cross stitches in each section as evenly as I can). SL st into top of CH 3 to complete row.
Row 2: CH 3 and place 40 criss-cross stitches in the stitches in your row. SL into top of CH 3 to complete row.
Rows 3 – : Repeat Row 2.
Row ?: *3 regular criss-cross st, then 1 decreasing criss-cross st.* Repeat * around the row.
Row ?: *2 regular criss-cross st, then 1 decreasing criss-cross st.* Repeat * around the row.
Row?: *1 regular criss-cross st, then 1 decreasing criss-cross st.* Repeat * around the row.
Row?: Decreasing criss-cross st for the entire row, with the exception of the 1st criss-cross st that will remain the same as always.
Row?: SL 2together for each st in row.
Finish off by placing 1 SL in st directly across from crochet hook, then another SL st in a stitch perpendicular to current.
Cut and Tie off yarn.
Attach a pom pom (tutorial here): https://youtu.be/6ISz8AcMusk
Other beanie tutorials in my 100 day series:


Leave a Reply