How to Crochet a Beanie – Day 56
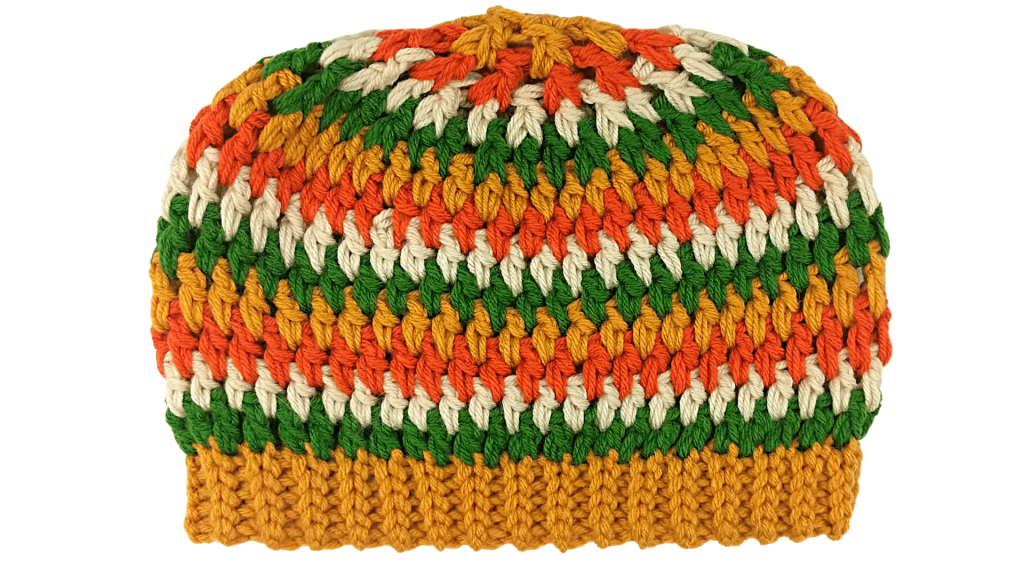
How to crochet a beanie? In this tutorial, I show you how to crochet a simple striped beanie that is warm and comfy, using a few simple stitches. This beanie works quickly and shouldn’t take you more than 1 hour to complete. The colors used in this pattern can easily be exchanged to fit whatever color scheme you like.
Crochet Beanie Tutorial:

Stitches used in this pattern (and their corresponding tutorials):
Attach Yarn to Crochet Hook: https://youtu.be/IsOvsrvJhN8
Chain (CH): https://youtu.be/jLP-o-RnqqQ
Slip stitch (SL st): https://youtu.be/cMNam0kuhpQ
Double Crochet (DC): https://youtu.be/bA7b2sOIfzM
Easy Crochet Beanie Pattern (FREE):
Crochet Hook: K / 10.5 / 6.5 MM
Yarn: 4 Medium ~ 2 Strands ~ Big Twist Value brand (any yarn will work for this pattern), multiple colors
*Note: for this entire pattern, we will be treating the two strands of yarn like they are one, crocheting them simultaneously.
Attach yarn to crochet hook with slip knot.
BRIM:
Row 1: CH 5, turn.
Row 2: 1 SL st in BACK BUMP ONLY of each st in the row (5 total st at end of row). CH 1, turn.
Row 3: Skip turning CH st, place 1 SL st in the BACK LOOP ONLY (BLO) of each st in the row (5 total st at end of row). CH 1, turn.
Rows 4 – ?: Repeat Row 3 until the brim reaches your desired length (~16 inches).
Attach the short edges of the brim together by placing 1 SL st in the corresponding stitches on the opposite edges (ensure you are working under the full st on both edges).
Cut and tie off yarn.
BEANIE:
Row 1: Attach the next color of yarn to crochet hook with a slip knot. Insert crochet hook in one of the available loops along the edge of the brim. Yarn over and pull through for a SL st. CH 3. Place 47 additional DC in the available loops along the edge of the brim (48 total st including CH st). SL st into top of CH 3 st. Cut and tie off yarn.
Row 2: Attach the next color of yarn to the crochet hook with a slip knot. Insert crochet hook in between two of your DC st from the previous row (you should not be placing your crochet hook in the top of the st, instead place it in the gap between the stitches. Yarn over and pull through the loops on your crochet hook for a SL st. CH 3. Place 1 DC in between each of your previous row’s DC st. SL st into top of CH 3 st and cut and tie off yarn.
Rows 3 – 9: Repeat Row 2.
Row 10: CH 3, 1 DC in between next 2 st, DC 2together in between next 3 st. *1 DC in between next 3 st (2 total DC st), DC 2together in between next 3 st* Repeat * around the row (36 total st at end of row). SL st into top of CH 3. Cut and tie off yarn.
Row 11: CH 3, DC 2together in between next 3 st. 1 DC in between next 2 st, DC 2together in between next 3 st.* Repeat * around the row. SL st into top of CH 3. Cut and tie off yarn.
Row 12: Insert crochet hook in between 2 DC st, yarn over and pull through, then insert crochet hook in between next 2 st and yarn over and pull through all loops on crochet hook. CH 3. DC 2together around the row (12 total st at end of row). SL st into top of 1st st. Cut and tie off yarn.
Row 13: Repeat Row 12 (6 total st at end of row). Cut and tie off yarn.
Attach a pom pom (pompon): https://youtu.be/6ISz8AcMusk


Leave a Reply