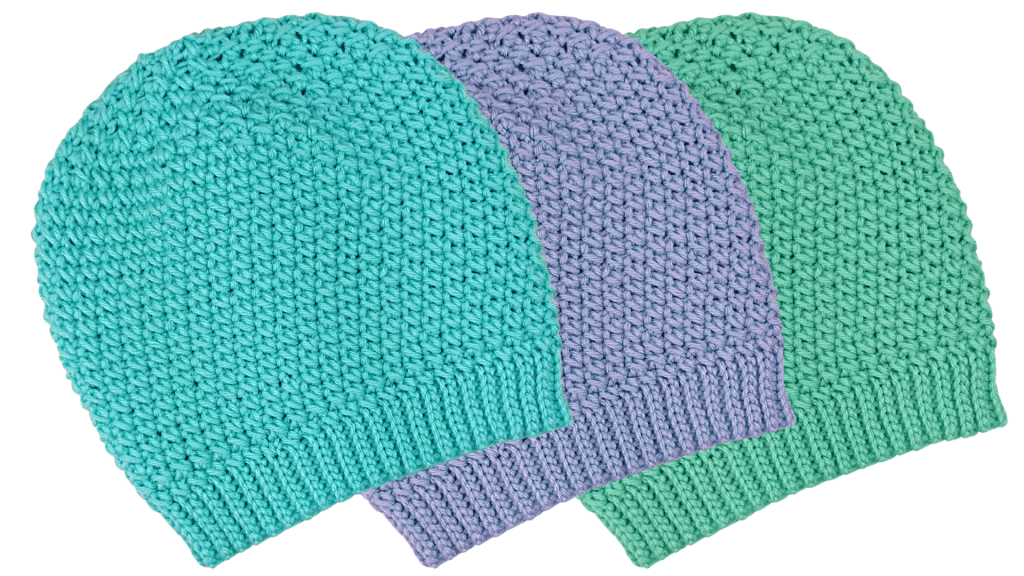
How to Crochet a Beanie – Day 68
How to crochet a beanie? In this tutorial, we transform the single-crochet stitch into a beautifully textured st. This beanie is very simple to create and shouldn’t take you more than 3 hours to complete. The colors in this pattern could easily be exchanged to fit whatever color scheme you would like.
Crochet Beanie Tutorial:

Stitches used in this pattern (and their corresponding tutorials):
Attach Yarn to Crochet Hook: https://youtu.be/IsOvsrvJhN8
Chain (CH): https://youtu.be/jLP-o-RnqqQ
Slip stitch (SL st): https://youtu.be/cMNam0kuhpQ
Single Crochet (SC): https://youtu.be/xppth_5GBzM
Crochet Beanie FREE Pattern:
Crochet Hook: F / 5 / 3.75MM
Yarn: 4 Medium ~ Big Twist Value brand
Note: this beanie has a precursor video, How to Crochet a Beanie Brim: https://youtu.be/V2zw-4mWR8E
BRIM: Crochet a brim that is 8 st deep and roughly 16’’ wide. Join the two edges together like I show you how to do in the precursor video. Turn brim inside-out to hide the ridge on the inside.
Row 1: CH 1, then place 1 SC in one of the loops behind the CH 1 st. Skip the next loop that you want to work in and place 1 SC, then place 1 SC in the skipped loop (behind current SC st). Repeat that pattern around your row until you have 90 SC st (45 criss-cross st). SL st into the top of the CH 1 st, or to the top of your 1st SC st (direction below accordingly).
Row 2: CH 2, place 1 SC in either the SL st from your previous row – do this if you placed your SL st in the 1st SC st in the previous row, or in the st behind your SL st – do this if you placed your SL st in the CH 1 st in the previous row). *Skip the next st that you have not already worked in and place 1 SC, then place 1 SC in the skipped st.* Repeat * around the row (45 total criss-cross st at end of row). SL st into either your 1st SC or the top of your CH 2.
Rows 3 – 19: Repeat Row 2.
Row 20: CH 2, and place 1 SC in st directly behind CH 2 st. *3 regular criss-cross st, then 1 decreasing criss-cross st.* Repeat * around the row (40 criss- cross st at end of the row). SL st into top of 1st st.
Row 21: CH 2, and place 1 SC in st directly behind CH 2 st. *2 regular criss-cross st, then 1 decreasing criss-cross st. Then, 2 regular criss-cross st, then 1 decreasing criss-cross st* Repeat * around the row (35 criss- cross st at end of the row). SL st into top of 1st st.
Row 22: CH 2, and place 1 SC in st directly behind CH 2 st. *2 regular criss-cross st, then 1 decreasing criss-cross st.* Repeat * around the row (30 criss- cross st at end of the row). SL st into top of 1st st.
Row 23: CH 2, and place 1 SC in st directly behind CH 2 st. *1 regular criss-cross st, then 1 decreasing criss-cross st. Then, 2 regular criss-cross st, then 1 decreasing criss-cross st.* Repeat * around the row (25 criss- cross st at end of the row). SL st into top of 1st st.
Row 24: CH 2, and place 1 SC in st directly behind CH 2 st. *1 regular criss-cross st, then 1 decreasing criss-cross st.* Repeat * around the row (20 criss- cross st at end of the row). SL st into top of 1st st.
Row 25: CH 2, and place 1 SC in st directly behind CH 2 st. *1 regular criss-cross st, then 2 decreasing criss-cross st.* Repeat * around the row (15 criss- cross st at end of the row). SL st into top of 1st st.
Rows 26 – 27: Place only decreasing criss-cross st across the row. SL st into top of 1st st.
Attach a pom pom (pompon):

This crochet beanie pattern is a part of my 100 days of beanies. Check them out below:

Leave a Reply