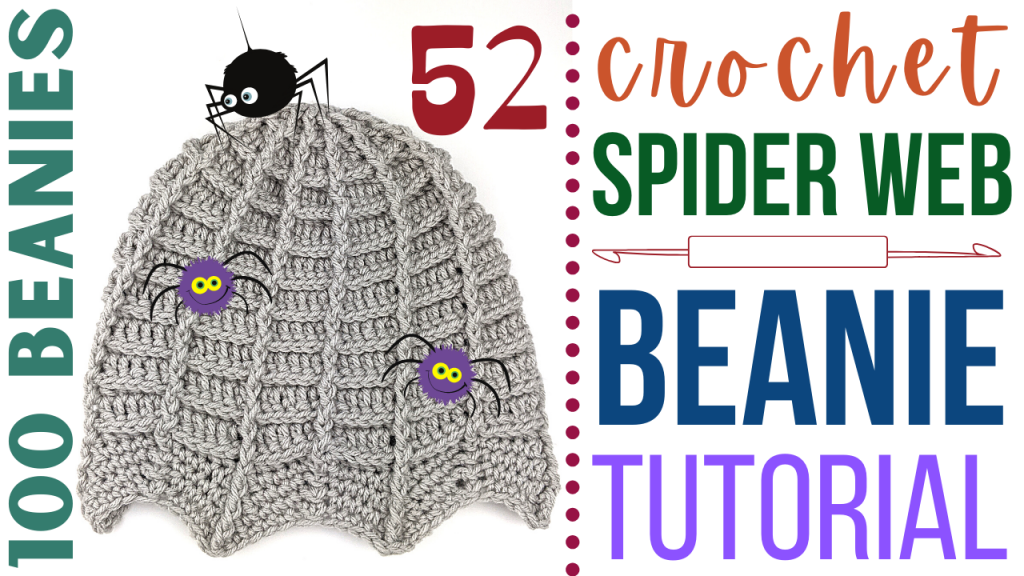
How to Crochet a Beanie – Day 52 – DIY Spider Web Beanie
How to crochet a beanie? In this tutorial, I show you how to make a really simple DIY beanie that looks like a spider’s web! This beanie works very fast and shouldn’t take you more than 1 hour to complete. The colors used in this beanie pattern can easily be exchanged to fit whatever color schedule you would like.
This beanie is sized for adults, but if you are interested in checking out a baby or child sized beanie, then please see the links below.
Child-sized spider web beanie video tutorial: https://youtu.be/-Vgl3LC_AnA
Baby spider web beanie video tutorial: https://youtu.be/shjDZS-qvZ0
Pom Pom (Pompon) Maker: https://youtu.be/6ISz8AcMusk
Spider Web Crochet Beanie Video Tutorial:
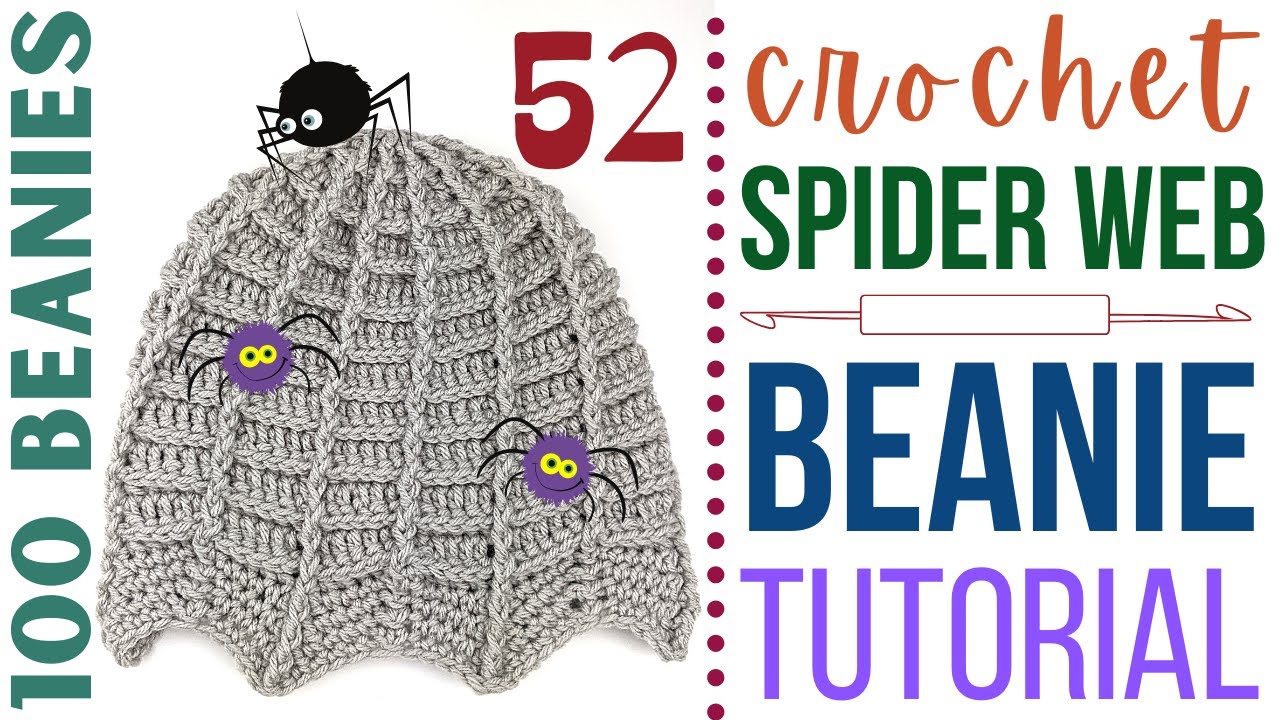
This beanie is part of a series of beanies that I am creating to donate to my local homeless shelter. The goal is to complete 100 beanies in 100 days, all using unique patterns that I am going to share with you each day.
Stitches used in this pattern (and their corresponding tutorials):
Magic Circle (MC): https://youtu.be/pTcHUJ8PDMQ
Double Crochet (DC): https://youtu.be/bA7b2sOIfzM
Single Crochet (SC): https://youtu.be/xppth_5GBzM
Slip stitch (SL st): https://youtu.be/cMNam0kuhpQ
Treble (Triple) Crochet (TR): no tutorial to date
Adult Spider Web Beanie Crochet Pattern
Crochet Hook: F / 5 / 3.75MM
Yarn: 4 Medium ~ Big Twist Value brand, Soft Gray
Magic Circle.
Row 1: 12 DC inside MC.
Row 2: Following a continuous loop pattern, place 1 DC + 1 FRONT POST st in each st in this row (24 total st at end of row).
Row 3: *2 BACK POST st in st 1, 1 FRONT POST st in st 2.* Repeat * around the row (36 total st at end of row).
Row 4: *1 DC in st 1, 2 DC in st 2, 1 FRONT POST st in st 3.* Repeat * around the row (48 total st at end of row).
Row 5: *1 BACK POST st in st 1 – 2, 2 BACK POST st in st 3, 1 FRONT POST st in st 4.* Repeat * around the row (60 total st at end of row).
Row 6: *1 DC in st 1 – 3, 2 DC in st 4, 1 FRONT POST st in st 5.* Repeat * around the row (72 total st at end of row).
Row 7: *1 BACK POST st in st 1 – 5, 1 FRONT POST st in st 6.* Repeat * around the row (72 total st at end of row).
Row 8: *1 DC in st 1 – 5, 1 FRONT POST st in st 6.* Repeat * around the row (72 total st at end of row).
Rows 9 – 22: Repeat Rows 7 & 8.
Row 23: Make sure that you have not placed the last FRONT POST st at the end of the last row (Row 22). *In that FRONT POST st, place 1 DC + 1 TR around the FRONT post + 1 DC in that FRONT POST st from the previous row. 1 SC in next 4 st. SC 3together in next 3 st. 1 SC in next 4 st.* Repeat * around the row. In the last SC 3together of this row, we need to SC 4together instead. Note: this is only for this row so that our count stays the same as we work our continuous loop pattern.
Rows 24 – 26: *In that FRONT POST st, place 1 DC + 1 TR around the FRONT post + 1 DC in that FRONT POST st from the previous row. 1 SC in next 4 st. SC 3together in next 3 st. 1 SC in next 4 st.* Repeat * around the row.
You can repeat the above pattern for more rows if you want to accentuate the pattern more.
Place 1 SL st in one of your low points in this pattern and then cut and tie off the yarn.
Attach a pom pom: https://youtu.be/6ISz8AcMusk
Other beanie tutorials in my 100 day series:

![]()
![]()
![]()
![]()
![]()
![]()
![]()
![]()
![]()
![]()
![]()
![]()
![]()
![]()
![]()
![]()
![]()


Leave a Reply