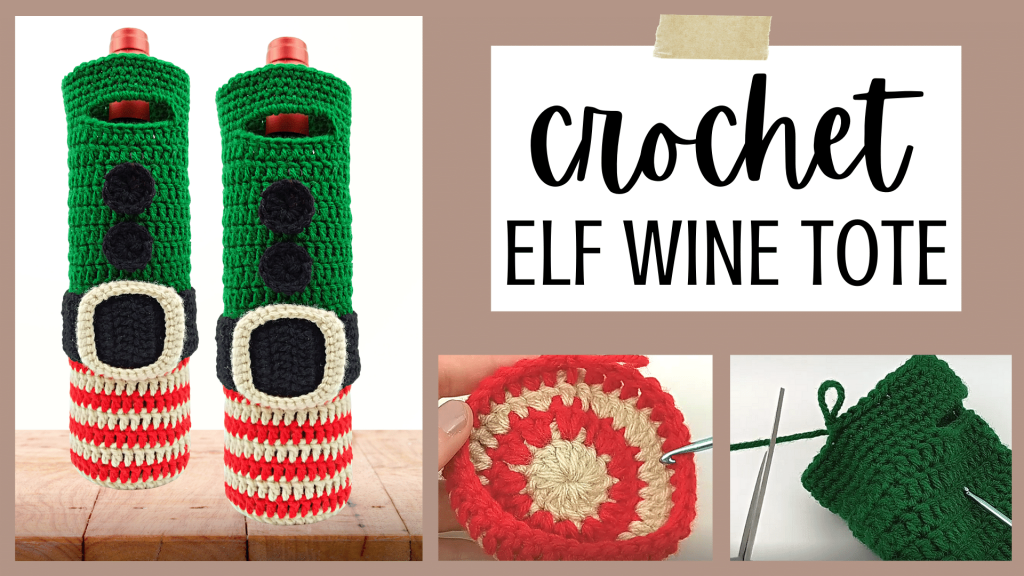
Crochet Elf Wine Tote
How to crochet an elf wine koozie? In this crochet tutorial, I show you how to crochet a simple wine koozie for Christmas. This elf-themed pattern is beginner friendly and an excellent small project if you are just starting out with crochet.
Crochet Elf Wine Koozie Video Tutorial:

This Christmas wine tote is a part of my four skein challenge, where I see how many different projects I can make using only four skeins of yarn. All yarn is the Big Twist Value brand, size 4, medium weight, acrylic. Each skein is roughly 380 yards.
Beginner Crochet Stitch Tutorials:
Elf Wine Tote
Crochet Hook: F / 5 / 3.75MM
Yarn: 4 Medium, Big Twist Value brand, Varsity Red, Varsity Green, Black, and Cream
*NOTE: I recommend crocheting over your tails each row, but you don’t have to. Follow along with the video if you are unfamiliar with crocheting over your tails.
Base:
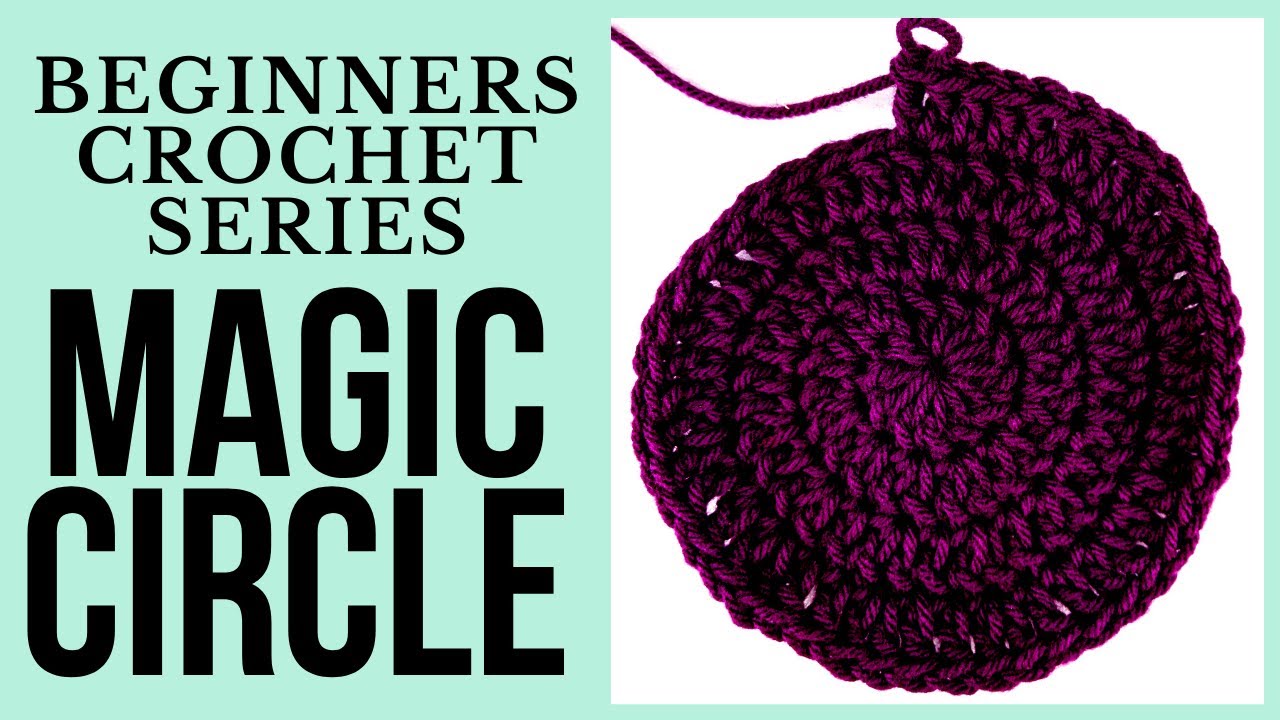
Row 1: Using CREAM yarn, attach yarn to crochet hook using a Magic Circle (MC). Place 13 DC inside MC. SL st in 2nd DC to join (12 total DC). Cut and tie off yarn.
Row 2: Attach RED yarn to crochet hook using a slip knot. Insert crochet hook into 1st DC st from Row 1. Place 1 SC + 1 CH in that st, then place 2 DC in each st in the row (including previous row’s SL st). SL st into top of 1st DC st (24 total DC st). Cut and tie off yarn.
Row 3: Attach CREAM yarn to crochet hook using a slip knot. Insert crochet hook into 1st DC st from Row 2. Place 1 SC + 1 CHin that st, then place *1 DC in next st, and 2 DC in the following st*. Repeat * around the row (including previous row’s SL st). SL st into top of 1st DC st (36 total DC st). Cut and tie off yarn.
Row 4: Attach RED yarn to crochet hook using a slip knot. Insert crochet hook in the 1st DC st from Row 3. Place 1 SC + 1 CH in that st, then place 1 DC in each st in the row (including previous row’s SL st). SL st into 1st DC st (36 total DC st). Cut and tie off yarn.
Rows 5 – 11: Repeat Row 4, alternating colors.
Row 12: Attach GREEN yarn to crochet hook using a slip knot. Insert crochet hook in the 1st DC st from Row 3. Place 1 SC + 1 CH + 1 DC in that st, then place 1 DC in each st in the row (skipping the SL st at the end of the row). SL st into 1st DC st (36 total DC st).
Row 13: CH 2, place 1 DC in same st as CH 2, then place 1 DC in each st in the row (skipping the SL st at the end of the row). SL st into the 1st DC st (36 total DC st).
Rows 14 – 22: Repeat Row 13.
Row 23: CH 9, skip 9 st, place 1 SC in st 10 – 18. CH 9, skip 9 st, place 1 SC in st 28 – 36.
Row 24: Place 9 SC AROUND the CH st that form the 1st handle. Place 1 SC in the 9 st between the handles. Place 9 SC AROUND the CH st that form the 2nd handle. Place 1 SC in the 9 st between the handles.
Rows 25 – 27: Place 1 SC in each st in each row (rows should flow seamlessly). At end of last row, between the 2nd and 1st handle, place 1 SL st in next 6 st.
Cut and tie off yarn.
Belt Buckle:
Row 1: Attach CREAM yarn to crochet hook using a slip knot. CH 10, turn.
Row 2: Place 1 SC in the BACK BUMP of each st in the row (10 in total). CH 1, turn.
Row 3: Place 1 SC in each st in the row (skipping turning CH). CH 1, turn.
Rows 4 – 9: Repeat Row 3.
Row 10: CH 8, Place 1 SC in the last st from Row 1. Place 1 SC in each of the st from Row 1. CH 8 and place 1 SC in the 1st st from Row 9. Place 1 SC in each of the st from Row 9.
Row 11: Place 8 SC st around the 1st set of CH 8 st (you should be in the st beside the CH 8). Place 1 SC in the st between the CH 8 st. Place 8 SC st around the 2nd set of CH 8 st. Place 1 SC in the st between the CH 8 st.
Row 12: Place 1 SC in each st in the row. In last 10 st, place 1 SL st instead of 1 SC.
Cut and tie off yarn.
Belt:
Row 1: Attach BLACK yarn to crochet hook using a slip knot. CH 10.
Row 2: Skip 2 CH st, then place 1 DC in the BLO of remaining 8 st. CH 2, turn.
Row 3: Skip CH 2, place 1 DC in each st in he row. CH 2, turn.
Rows 4 – 23: Repeat Row 3.
Row 24: *Before completing this row, make sure you draw your belt through the holes in your belt buckle. SL st the two short edges of the belt together by placing 1 SL st in each of the corresponding stitches.
Cut and tie off yarn.
Turn belt and buckle inside out. Hide tails. Slide up the base of the wine tote.
Buttons:
Row 1: Place 13 DC inside MC. SL st into 2nd DC st to join.
Cut and tie off yarn.
Use two tails to secure to wine tote. Make sure to center buttons with the handle.
(I placed 2 buttons, but you can place as many as you want).
Assemble:
Slide belt buckle up wine tote.
Attach buttons using tails from buttons to “sew” buttons onto wine koozie.
Insert bottle of wine or other.
Other projects in my Christmas four-skein challenge:


Leave a Reply