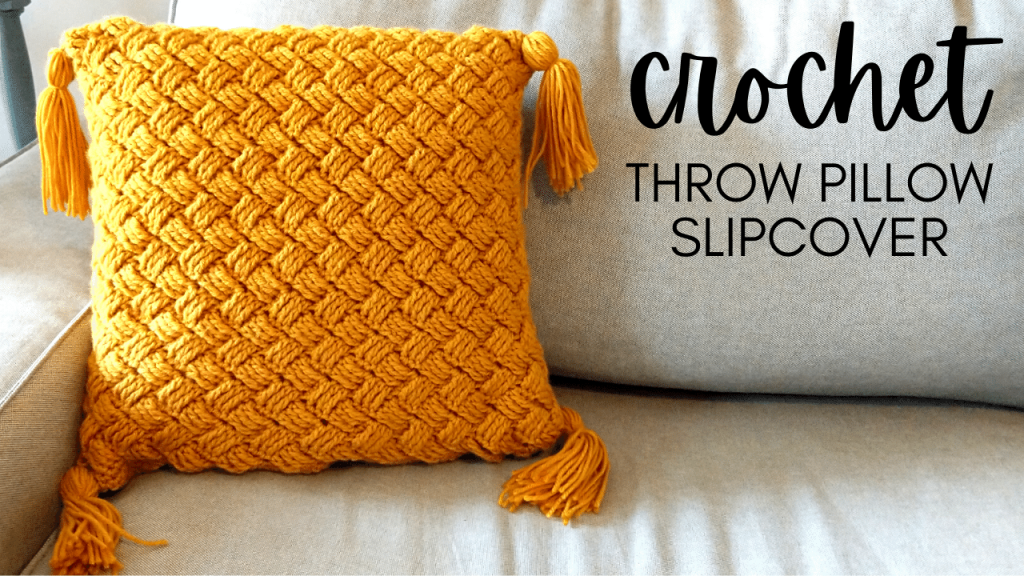
How to Crochet Throw Pillow Slipcover
How to crochet a quick and easy throw pillow slipcover? In this crochet tutorial, I show you how to make a versatile and removeable throw pillow cover that is great for welcoming a new season! This throw pillow is made out of the basket weave stitch, which is a surprisingly simple stitch to crochet, and it works very quickly.
Crochet Throw Pillow Slipcover Video Tutorial:

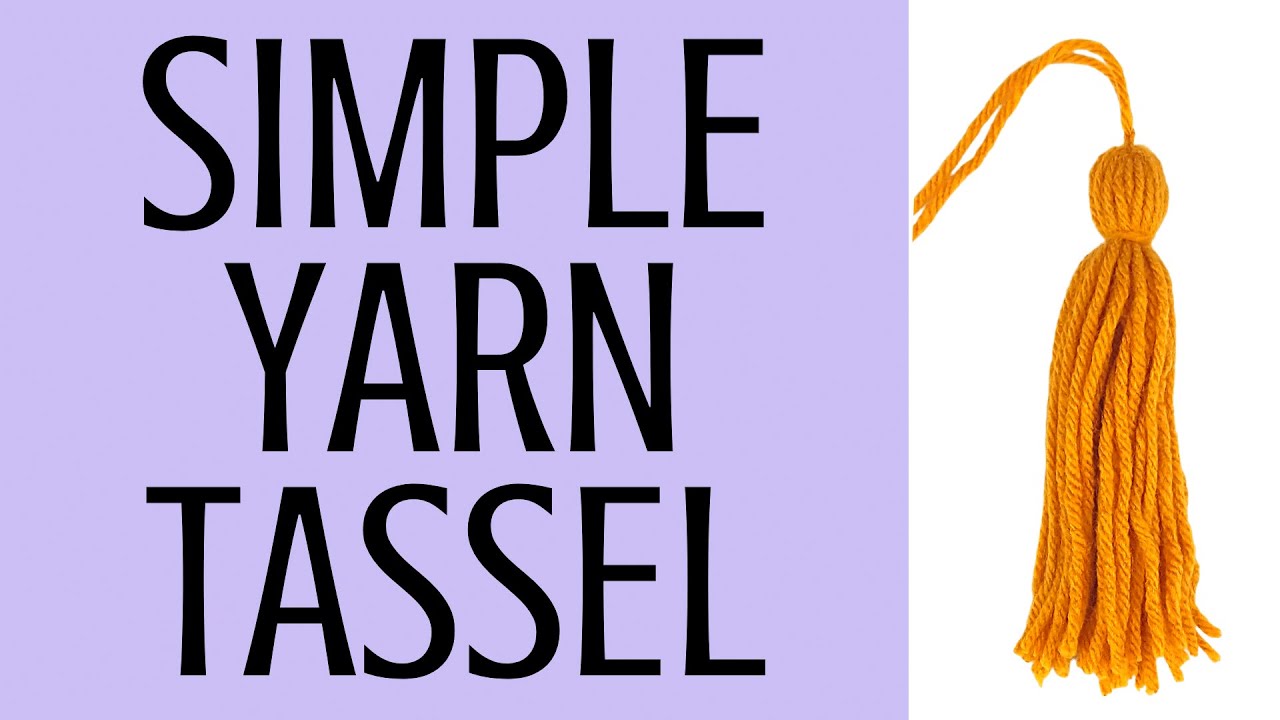
DIY Yarn Tassel Tutorial:
Basket Weave Crochet Throw Pillow Cover Crochet Pattern:
Crochet Hook: H/8/5.00MM
Yarn: 4 Medium
4 Yarn Tassels (tutorial video here): https://youtu.be/9Ck1SAjIJKY
14’’ Throw Pillow Insert
Attach yarn to crochet hook using a slip knot.
Row 1: CH 73, turn.
Row 2: Place 1 SC in the BLO of each st in the row, starting with the 2nd CH st from the crochet hook (72 total SC). At the end of the row, turn work toward the tail and place 1 SC in each of the FLO of each st from Row 1 (this will create a round pattern with 144 SC). SL st in 1st SC st to join.
Row 3: First st of this row is the current st where you placed the SL st. Skip the 1st 3 st, then place 1 TR in each of the following 3 st. Working backwards, place 1 TR in each of the skipped st – starting with the 1st skipped st, making sure to work these IN FRONT of the TR st just created. *Skip the next 3 st, placing 1 TR in each of the following 3 st, then working backwards, place 1 TR in each of the skipped st – starting with the 1st skipped st, making sure to work these IN FRONT of the TR st you just created.* Repeat * around the row (24 total basket weave sections). Skip the SL st at the end of the row.
Row 4: Place 1 SL st in the following 3 st. *Skip the next 3 st, placing 1 TR in each of the following 3 st, then working backwards, place 1 TR in each of the skipped st – starting with the 1st skipped st, making sure to work these BEHIND of the TR st you just created.* Repeat * around the row, working the last set of basket weave st in the last 3 st of the row and the 3 SL st created at the beginning of the row (24 total basket weave sections).
Row 5: Place 1 SL st in the following 3 st. *Skip the next 3 st, placing 1 TR in each of the following 3 st, then working backwards, place 1 TR in each of the skipped st – starting with the 1st skipped st, making sure to work these IN FRONT of the TR st you just created.* Repeat * around the row, working the last set of basket weave st in the last 3 st of the row and the 3 SL st created at the beginning of the row (24 total basket weave sections).
Rows 6 – 24: Repeat Rows 4 & 5 to build the body of the throw pillow slipcover.
Row 25 – Place 1 SL st in each of the stitches between where your crochet hook is and the next fold of the throw pillow slipcover (if you lay the slipcover down flat, you should be able to see it). Once you make it to the 1st fold, then CH 1 and place 1 SC in the next 72 st.
Rows 16 – 39: CH 1 and turn the work. Place 1 SC in each of the 72 st from the previous row.
Cut and tie off yarn.
Attach 1 tassel at each of the 4 corners. DIY Yarn Tassel Tutorial Video: https://youtu.be/9Ck1SAjIJKY
Other Crochet Household Items:


Leave a Reply