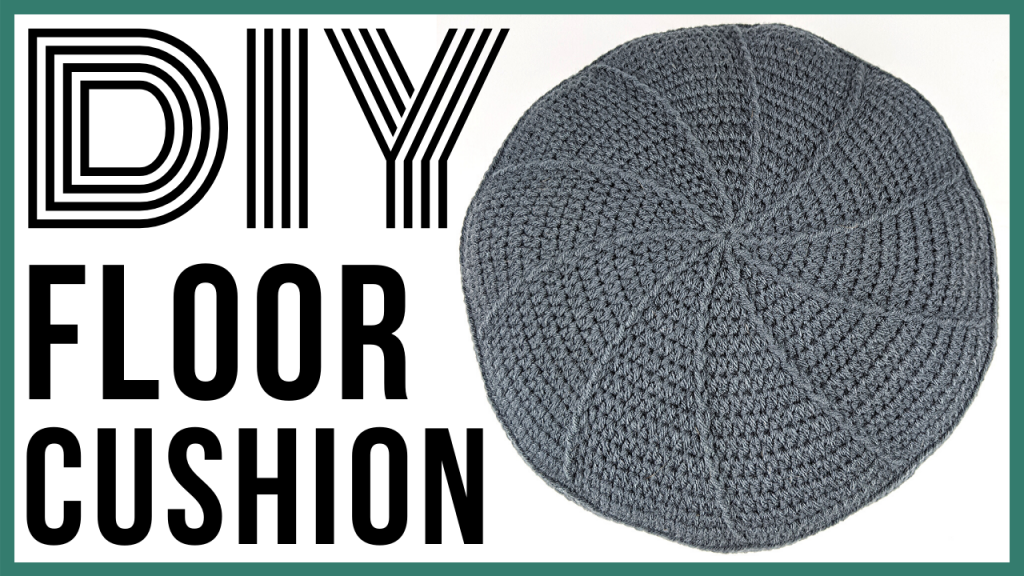
DIY Crochet Floor Pillow – Customizable Size – How to Reuse Plastic Bags
In this tutorial, I show you how to make an adorable floor pillow for meditating or stretching. I made this crochet pattern easy to customize to fit whatever size you need. This is a great addition to my yoga practice and has really helped me with some of my deeper stretches, especially with my Yin yoga practice or doing the splits.
I chose to stuff mine with waste and plastic bags I’ve accumulated recently due to curb-side grocery pickups, but you can literally use almost anything you have around your home.
If you need help with any of the stitches used in this pattern, check out my beginner’s crochet series here: https://www.youtube.com/playlist?list=PLUmcifMqZH5s3cLaL0U6V8qzPffPnsckA
How to Crochet a Floor Pillow Video Tutorial:

Crochet Floor Pillow Pattern:
Yarn: 4 Medium
Crochet Hook Size: F / 5 / 3.75 MM
MC – Magic Circle
HDC – Half Double Crochet
*Continuous loop pattern (no starting/stopping rows).
MC
Row 1: 10 HDC in MC (10 total st at end of row).
Row 2: *1 HDC in 1st st, 1 HDC around the front post (this should be done in the same st).* Repeat * for each st in row (20 total st at end of row).
Row 3: *2 HDC in st 1, 1 HDC around the front post of previous row’s front post st (st 2).* Repeat * around the row (30 total st at end of row).
Row 4: *1 HDC in st 1, 2 HDC in st 2, 1 HDC in front post of st 3.* Repeat * around the row (40 total st at end of row).
Increase the ottoman top to whatever size you would like by placing 1 HDC in each HDC st. When you reach the st directly before the previous row’s front post st, place 2 HDC. Then, place 1 HDC around the previous row’s front post st. Each row should increase by 10 st. Continue this pattern until the meditation pillow reaches your desired circumference.
Once your meditation pillow has reached your desired circumference, place 1 HDC in each st for 1 row. Don’t crochet around the front post stitches. Instead, place 1 st in the top of the st. For the next row, place 1 HDC in the BACK “V” of each stitch. Continue until this yoga prop reaches your desired height.
Once the meditation cushion has reached your desired height, begin by placing 1 front post st (trying to line it up with a front post from the last row with front post stitches). Next, count the number of stitches between posts in the previous front post row and place 1 HDC in that same number of stitches. In this tutorial, I had 16 stitches between my posts. So, I placed my first st (front post), then I placed 1 HDC in the next 16 st, then I placed another front post st. I repeated this pattern around the row.
Once you get back to the 1st st of the row, skip the st directly before it and then place your front post st. Repeat this pattern, skipping the st directly before your front post stitches, until you have decreased this down to a small hole that can be used to stuff. I chose to stuff mine with plastic bags I have been receiving from my curb-side grocery store runs (making zero waste nearly impossible for me).
Once your meditation pillow is stuffed to your liking, then continue the decreasing pattern until you get to the point that you have 1 regular st between your front post stitches. Decrease from there by placing 1 front post st in each front post, and skipping the regular st altogether. Then place 1 SL in each of the front post st. Seal the hole by placing 1 SL across from your current st, then across the circle again until the hole is sealed.
Tie off your yarn and hide your tails inside the meditation pillow.
Other household items crochet tutorials:

Leave a Reply